
Idle Particles
This guide explains how to create idle particles (commonly called auras) using custom prebuilt aura packs.
This guide explains how to create idle particles (commonly called auras) using custom prebuilt aura packs. It does not teach you how to make idle particles from scratch — it's designed for copy-paste integration of existing particle packs into your champion's .wad.client file.
Required Tools
| Tool | Purpose |
|---|---|
| Flint | For extracting .wad.client files |
| LtMAO cslmao | For installing and testing your mod |
| Jade | For editing .bin files visually |
| Ritobin | Alternative: convert .bin to text |
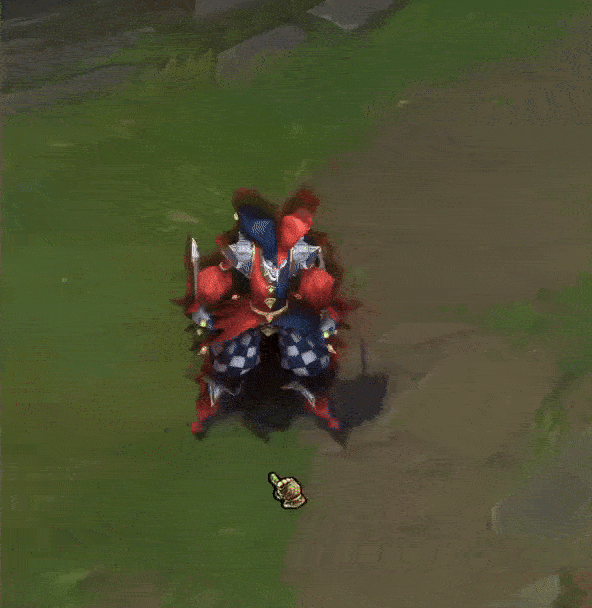
❓ What Are Idle Particles?
Idle particles are ambient visual effects attached to a champion — things like flames, glows, or magic circles. They're defined in the IdleParticlesEffects section of your champ's main.bin.
Video Guide
https://youtu.be/bUJSVlVHEZM?si=t5x9KsKktPGM6ejD&t=133 Recommended
Is It Hard?
It's not too difficult if you're using prebuilt packs like the ones provided here. The hardest part is locating the right section and placing the code correctly — especially if you're new. Just follow the steps carefully and take your time!
⚠️ If something doesn't work, double-check brackets
{}and indentations.
Written Guide
Step 1 – Download an Aura Pack
You'll find packs in our Discord. Download the one you want to use.
Step 2 – Extract Champion Files
Open Flint, locate your champion's .wad.client file, and extract the contents into a folder.
Step 3 – Add Custom Particles
Open the champ folder you just created and the aura pack folder you downloaded.
Copy the customparticles folder (inside assets) from the aura pack into your mod's assets folder.

Step 4 – Convert skin0.bin to .py
Navigate to:
yourchamp\data\characters\yourchamp\skins\
Drag skin0.bin onto ritobin_cli.exe. If done right, it will create a skin0.py file.
Step 4.1 – Copy Idle Particle Code
Open the .py file from the aura pack and your converted skin0.py file in a code editor (e.g. Visual Studio Code).
Copy the relevant idle particle section and paste it into the correct spot in your own .py.
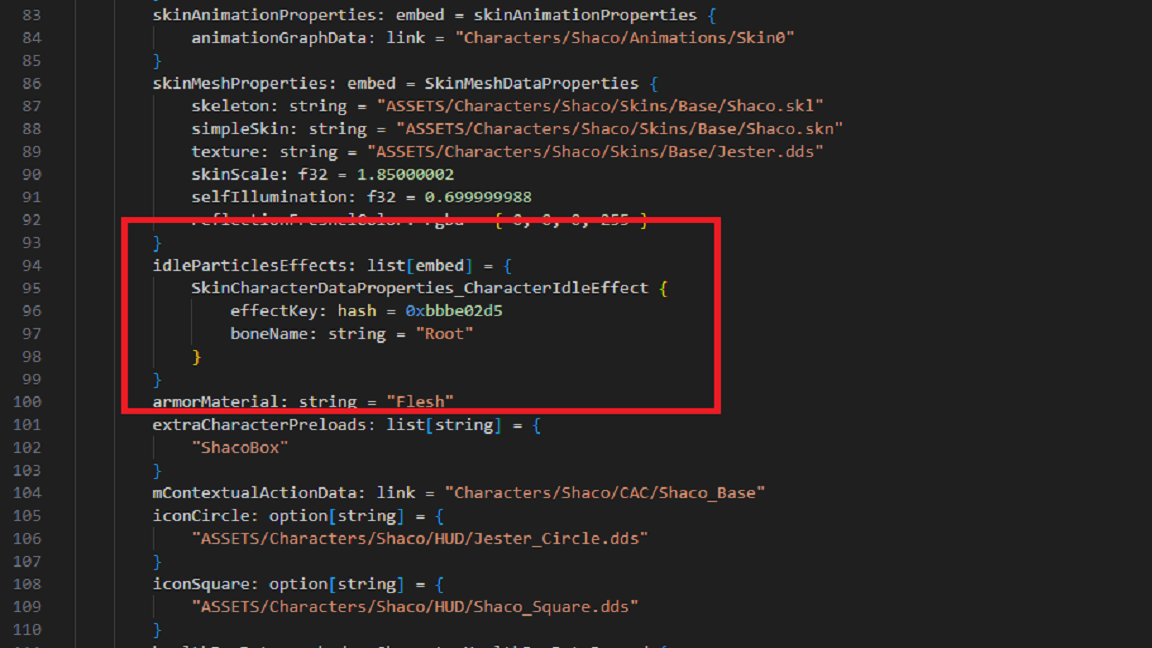
effectKey:= link to the particleboneName:= where the aura appears on the model
Bones You Can Use:
| Bone Name | Effect Location |
|---|---|
"Spine1" | Middle of the body |
"Head" | Top of the body |
"L_Hand" / "R_Hand" | Left / Right hand |
"Pelvis" | Lower torso |
"L_Foot" / "R_Foot" | Feet |
"C_Buffbone_Glb_Layout_Loc" | Static ground bone |
"Weapon" | Usually for weapons |
Weapon bones vary per champ; check the
.sklfile to confirm.
Step 4.5 – If Idle Particles Already Exist
If your skin0.py already includes an IdleParticlesEffects section:
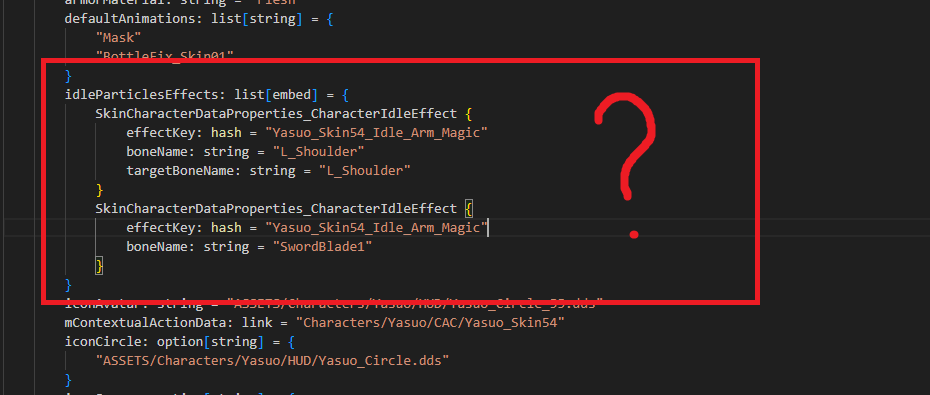
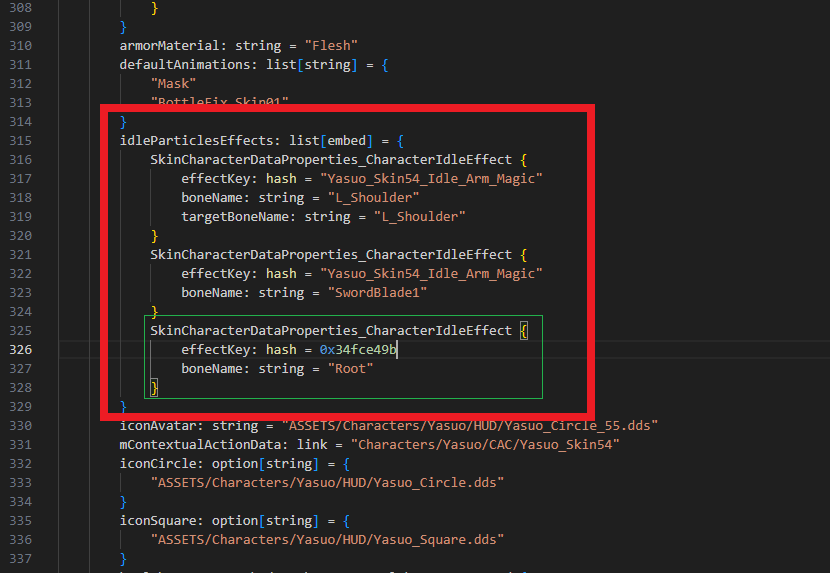
Only copy the particle block from the aura .py. Paste it between any two containers.
Step 5 – Add the Particle Container
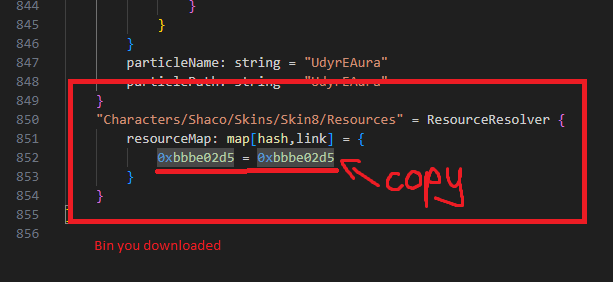
Copy the particlecontainer code, which always starts with a hashed (0x3432432) name and ends with particlePath: string, into your skin0.bin/.py. Just between any particle container, it doesn't matter between which one.
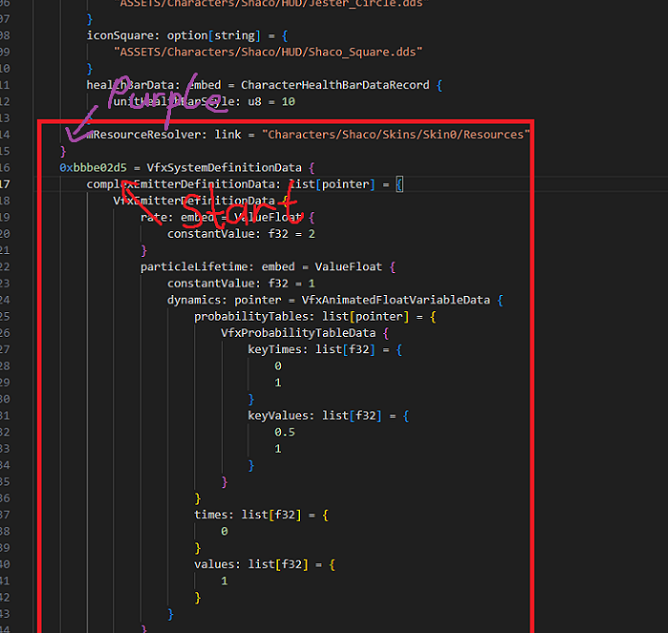

Step 6 – Add to Resource Resolver
Insert your copied code between these two lines:
mResourceResolver: link = "Characters/YourChamp/Skins/Skin0/Resources"
and wherever your other containers are. You can paste it anywhere in this block.

Step 7 – Save the File
- Click File > Save in your editor
- Then drag
skin0.pyback ontoritobin_cli.exe - This will recompile it into a new
skin0.bin
If the file timestamp updates, your changes were successful. If not, double-check your formatting.
➜ Aura Packs
Download Aura Packs on our Discord!
— Guide & packs by Frog
Static Materials
``plaintext materialOverride: list[embed] = { SkinMeshDataProperties_MaterialOverride { material: link = "a_unique_name" submesh: string = "yoursubmesh" } } ``
Hacksaw
This tutorial covers how to recolor League of Legends VFX (particles) using Hacksaw, a tool built for the custom skin modding community by Martynas.